
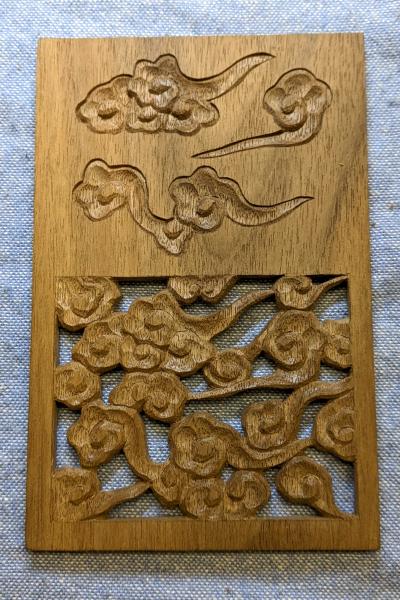
How to carve patterns Part 16 ~Clouds~

In this lesson, we’ll learn how to carve cloud motifs in the simplest way possible.

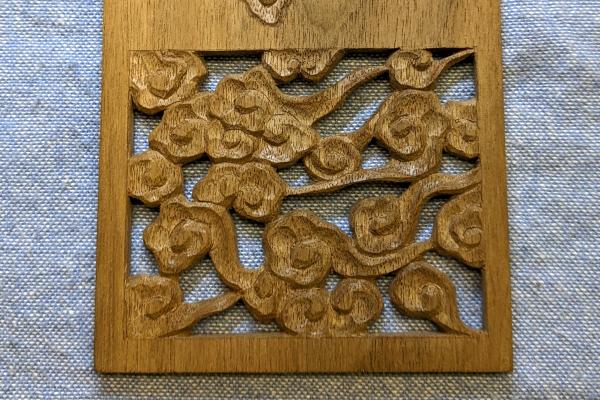
Once you're comfortable with the technique, you can add an openwork (透かし彫り) element by cutting out parts of the wood for a more dynamic, layered effect.

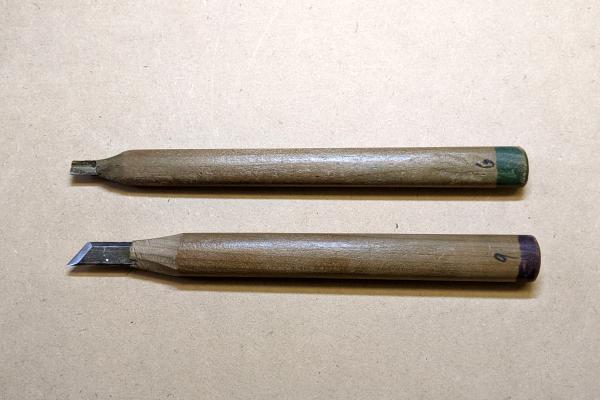
Tools Used
-
A sharp chisel
-
A shallow round chisel
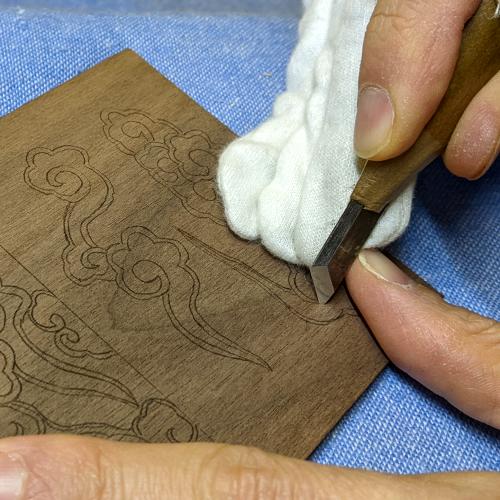
Preparation
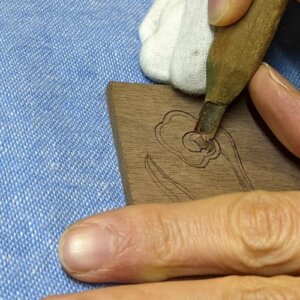
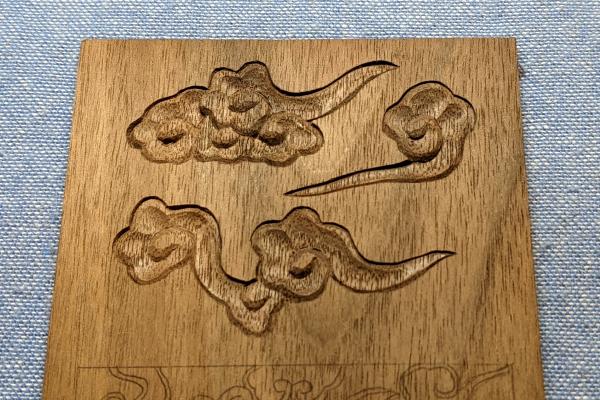
Use carbon paper to trace the cloud pattern onto a postcard-sized wooden board (approximately 5mm thick).
You can download the latest sketch here: [the latest version of cloud PDF]
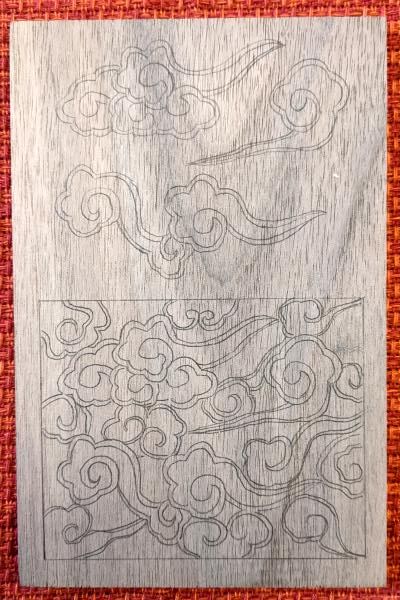
⚠️ The sketch shown in the photo above was traced from an earlier version and may differ slightly. Be sure to use the most recent version when transferring to your board.
How to Carve Cloud 1
We'll use the cloud in the upper-right corner of the sketch as a step-by-step example.
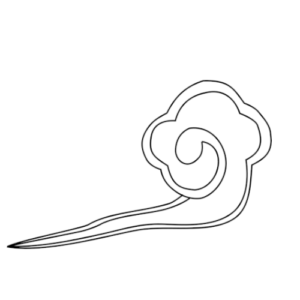
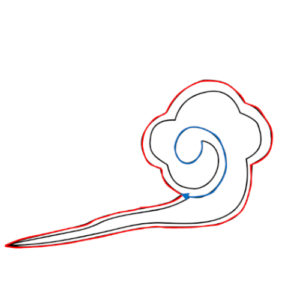
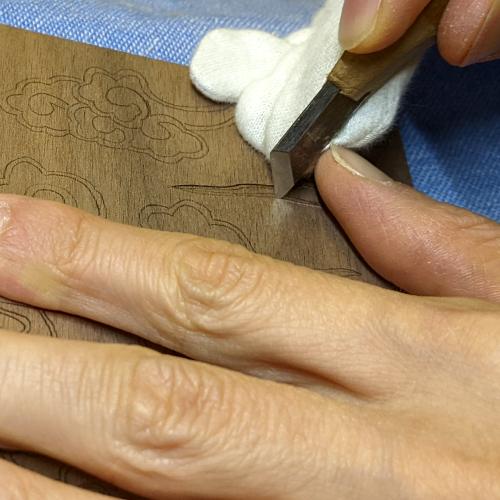
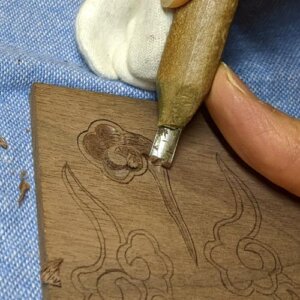
Step 1: Cut the Outline
Refer to the image below:
-
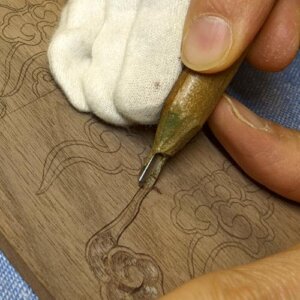
Along the blue arrow lines, make a cut with the sharp chisel, gradually getting deeper in the direction of the arrow.
-
Along the red lines, make cuts at a constant depth.
🔹 Blue = gradually deeper
🔴 Red = even depth
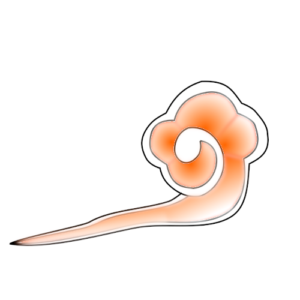
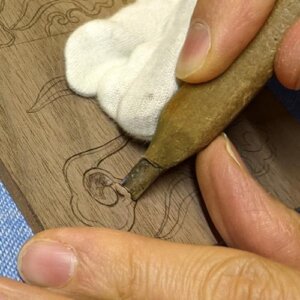
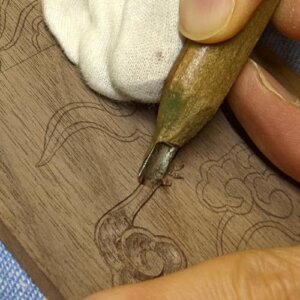
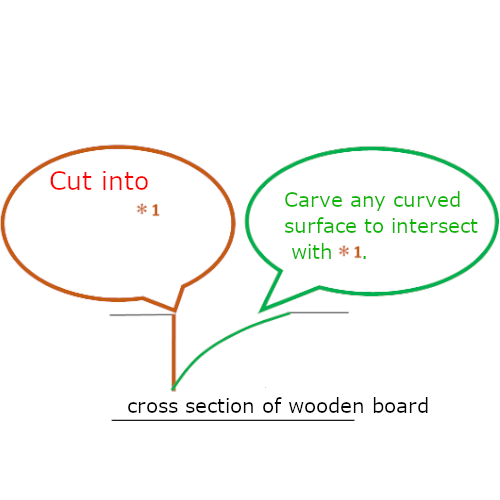
Step 2: Carve Depth with the Shallow Round Chisel
Using the shallow round chisel, carve the orange areas so that they are deeper, especially where they intersect with the blue arrow lines.
This creates a flowing surface and natural-looking depth.
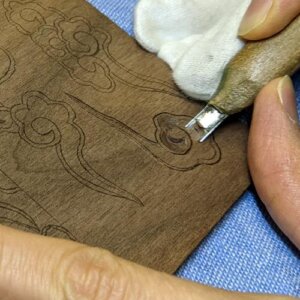

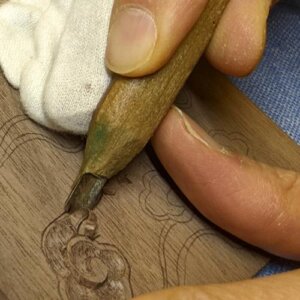
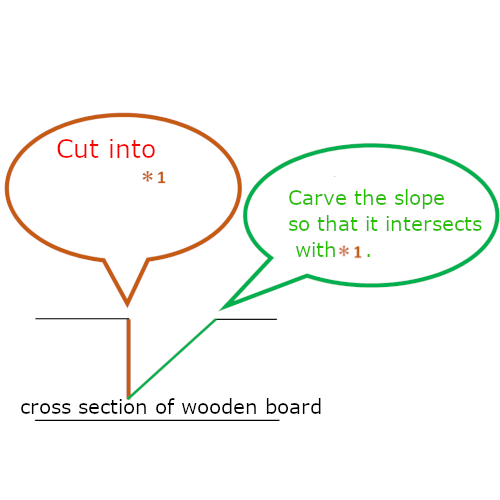
Step 3: Shape Curves and Slopes
Now, smooth out the green corners to blend with your earlier cuts.
Use gentle, curved strokes to create soft, natural transitions — mimicking the light, airy quality of clouds.
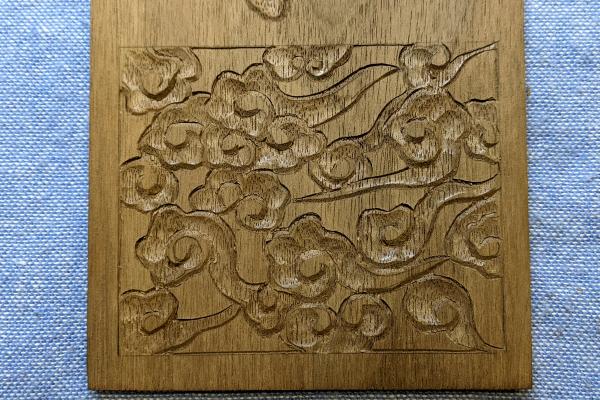
At this stage, the basic form of the cloud is complete.

A Note on Artistic Expression
There is no single correct way to carve clouds.
Use the method described above as a foundation, but feel free to experiment with varying depths, chisel angles, and curved surfaces.
Let your carving respond to the shape and flow of each cloud—find your own style as you go.
For overlapping areas where clouds seem layered, simply carve the "background cloud" deeper. This helps clarify the front-to-back positioning and adds visual dimension.
How to Carve Cloud 2 (Openwork Method)
Once you're confident carving the basic cloud form, try adding openwork for dramatic, airy effects.
Step 1: Rough Carving
Start by carving as you did in Cloud 1.
Don't worry if it feels a bit rough at this stage—you'll refine it later.
Step 2: Drill and Cut Out
-
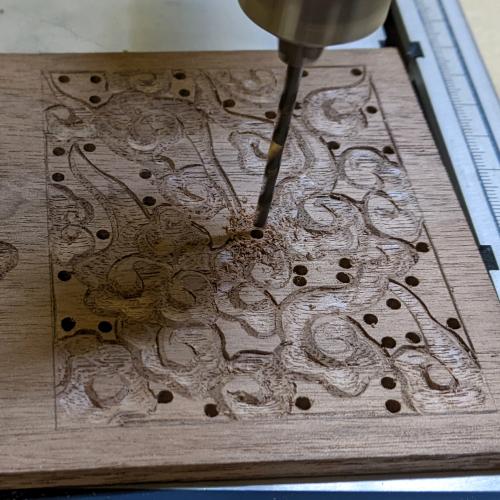
Use an electric drill to create a hole in the area around the clouds.
-
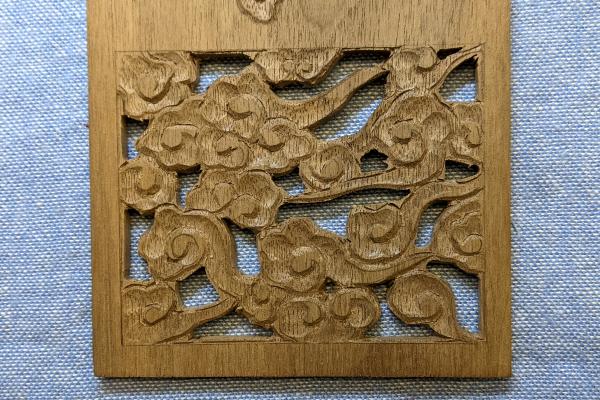
Then, using a scroll saw, cut out everything except the cloud shapes.
🔧 If you don’t have a scroll saw, drill multiple holes around the area (as close as possible without damaging the design) to carefully remove the material.
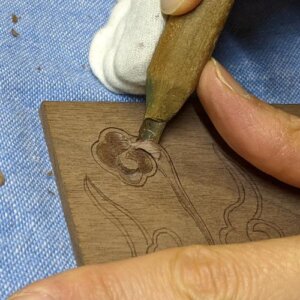
Step 3: Add Final Depth and Dimension
Once the openwork is complete, go back over the cloud shapes using the sharp chisel and shallow round chisel to refine curves and add a three-dimensional effect.
How to carve patterns
- From the lattice to the scales
- Raimon
- Asanoha and Sayagata
- Seigaiha and Sippo-Tsunagi
- Higaki and Kumikikko
- Mimasu-Tsunagi and Mimasu-Chirashi
- Ryusui
- Bundo-Tsunagi and Tatewaku
- Yamajimon and Misujidate
- Kemanmon and Gobosei
- Chidori and Chidori-Goshi
- Nejiume (Twisted plum)
- Kikubishi and Yaegiku
- Ichimatsu and Sankuzushi
- Kikko and Yagasuri
- Clouds ←Current page displayed
- Waves