
How to carve patterns part 2 ~Raimon~
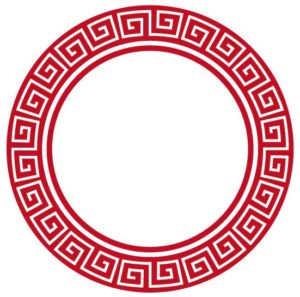
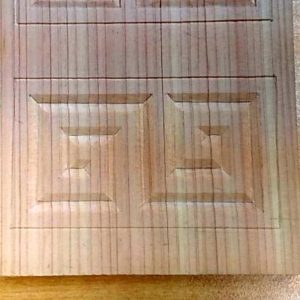
Raimon is a representative pattern of ancient China.
When I see this pattern, it reminds me of the Chinese noodles I ate in my neighborhood when I was a student.This is because the bowl of Chinese noodles I ate drawn on it.
This time, I explain two examples of how to carve "Raimon".
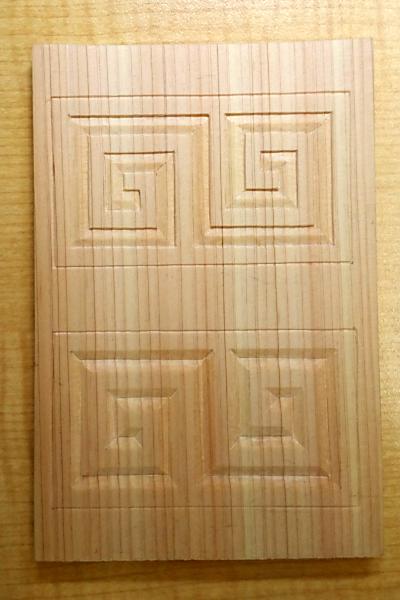
It's interesting how a small difference in carving can create a completely different look.
Preparation
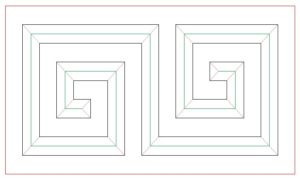
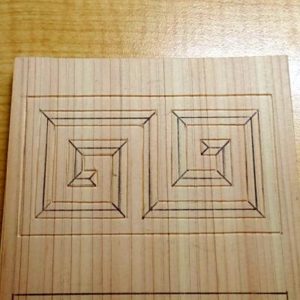
Use carbon paper to trace the thunder pattern onto a postcard-sized wooden board. The sketch can be downloaded from here (Raibun PDF) , so please use it.
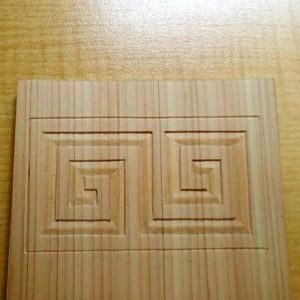
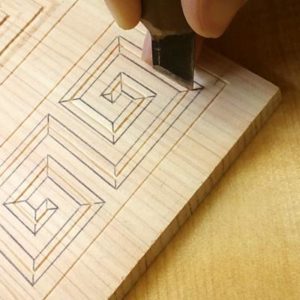
1.Raimon with high center
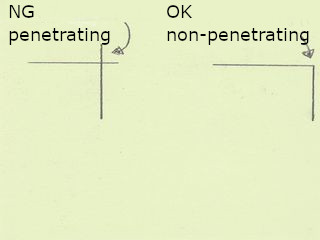
Carve the solid red and black lines of the sketch using a triangular chisel. I think you can do straight line carving without any problem if you can carve the lattice pattern from last time . Be careful not to let the line cut through where straight lines connect.
Next, make an incision with a sharp chisel in the part carved with the triangular chisel .

Next, use a flat chisel to carve the slope of the green line in the sketch from the part where you made the incision.
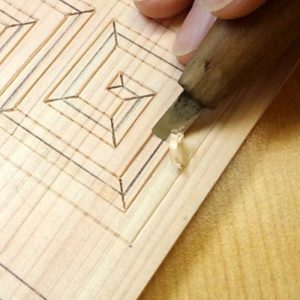
The solid green line in the sketch is the highest, so try to create a slope without carving this part as much as possible.
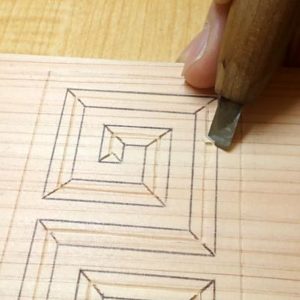
2.Raimon with low center
This is the opposite of the previous version, in which the center is the lowest point.
First, carve the solid green line part with a triangular chisel.
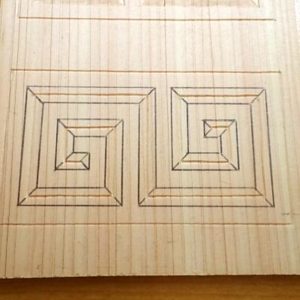
Next, use a sharp chisel to make cuts in the dotted lines in the sketch, making the cuts become deeper toward the center.
Next, use a flat chisel to carve the slope so that the center part is the lowest.
I'm getting hungry. Let's eat Chinese food tonight.
How to carve patterns
- From the lattice to the scales
- Raimon ←Current page displayed
- Asanoha and Sayagata
- Seigaiha and Sippo-Tsunagi
- Higaki and Kumikikko
- Mimasu-Tsunagi and Mimasu-Chirashi
- Ryusui
- Bundo-Tsunagi and Tatewaku
- Yamajimon and Misujidate
- Kemanmon and Gobosei
- Chidori and Chidori-Goshi
- Nejiume (Twisted plum)
- Kikubishi and Yaegiku
- Ichimatsu and Sankuzushi
- Kikko and Yagasuri
- Clouds
- Waves