
How to carve patterns part 3 ~Asanoha and Sayagata~
This time, I explain how to carve "Asanoha" and "Sayagata".
The carving is a little detailed. If you can carve the patterns 1: From the lattice to scales and 2: Raimon there will be no problem.
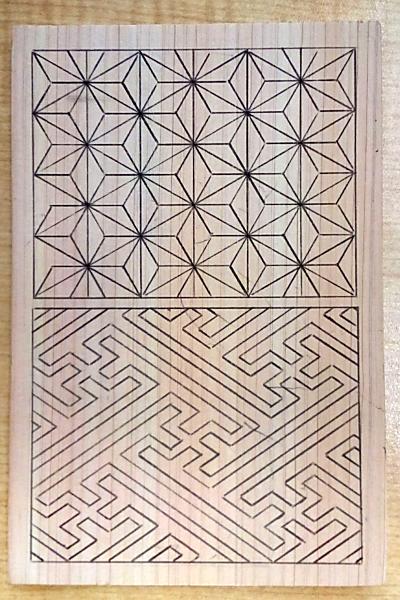
Preparation
Use carbon paper to trace Asanoha and Sayagata onto a postcard-sized wooden board. The sketches can be downloaded from here (PDF of Asanoha and Sayagata) , so please use them.
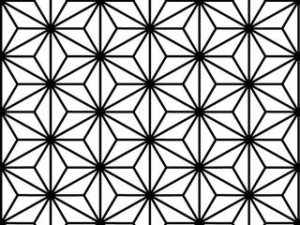
1. How to carve Asanoha
First, carve the lines of the Asanoha shape with a triangular chisel.

Next, carve the triangular slope with a sharp chisel or a flat chisel. The carving method is almost the same as the scale pattern explained in How to Carve a Pattern, Part 1, so I don't go into details.
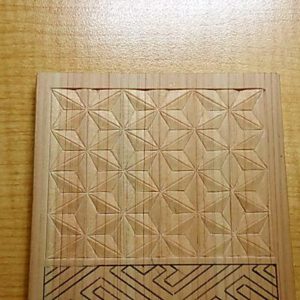
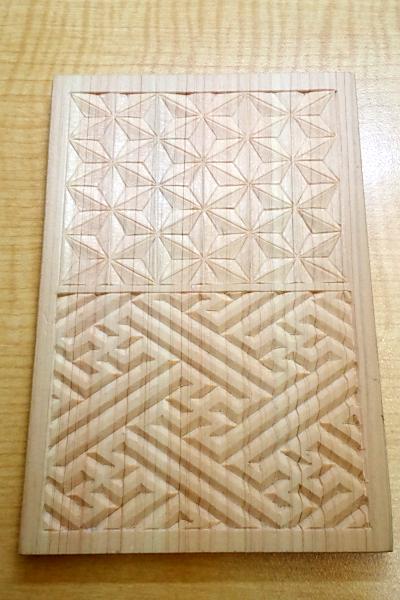
Finally, re-carve the pattern with a triangular chisel to complete the piece.
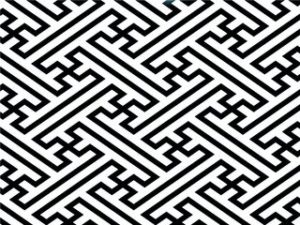
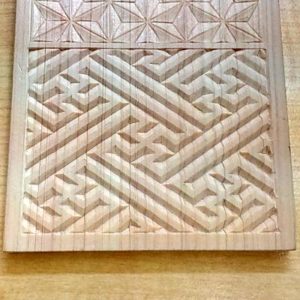
2.How to carve Sayagata
Sayagata is almost the same as Raimon carving method, which has a low center, explained in How to Carve Patterns Part 2 .
First, carve the lower part with a triangular chisel.
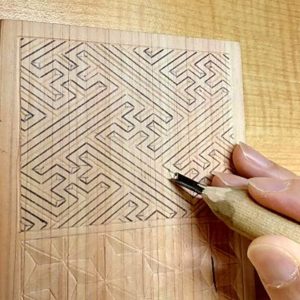
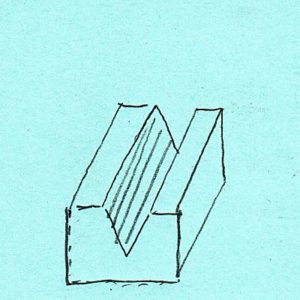
Next, carve the slope and complete it. Since the size of the sketch is smaller than before, I think it would be better to carve the slope in a Yagen(V-shape) with a sharp chisel for a cleaner finish.
How to carve patterns
- From the lattice to the scales
- Raimon
- Asanoha and Sayagata ←Current page displayed
- Seigaiha and Sippo-Tsunagi
- Higaki and Kumikikko
- Mimasu-Tsunagi and Mimasu-Chirashi
- Ryusui
- Bundo-Tsunagi and Tatewaku
- Yamajimon and Misujidate
- Kemanmon and Gobosei
- Chidori and Chidori-Goshi
- Nejiume (Twisted plum)
- Kikubishi and Yaegiku
- Ichimatsu and Sankuzushi
- Kikko and Yagasuri
- Clouds
- Waves